Thursday, May 29, 2008

Where are you…

We have visitors to this site from all the countries below.


Sign the guest book and let everyone know where you are.

I know it’s been a few days since the last post but there just hasn’t been much going on and we are busy making up the time we took off for Memorial Day. The other slow down is due to my own error. In my haste to get the project going I put off ordering fiberglass tape and epoxy. The plans call for 12 oz. 45/45 biaxial tape and I don’t have a local source so it would have to be ordered. I was to get this done within the first week of the project but let it slip my mind and we ran out of the little amount on hand while splicing the panels together last week. That was the time you’d think I would go ahead and get some ordered right? Wrong, I put it off until Wednesday morning. Luckily I knew that I could get what I needed from our friends at Bateau’s Boat Builder Central Store and they would ship it out the same day via DHL as long as they have the item in stock They had everything in stock and a delivery is due Friday. I also ordered some of their Marinepoxy brand epoxy to give it a try. At a cost of around $50.00 per gallon when purchased in quantity it will save us $25.00 or more per gallon for the project and the plans call for 12 gallons. That’s $300.00 in savings, so I hope we like this stuff. I’ll let you know as soon as we get a chance to try it this weekend. I have a little bit of MAS epoxy left that I will use to spot weld the panels tonight while waiting for the materials to arrive and we can jump straight into taping Saturday morning.

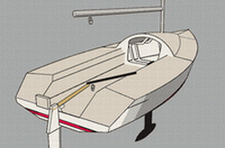
The panel set up went so well I don’t have much to say about it. We did come up with the little jig pictured below to help hold the topside panel in place while we got the next ones in place. It is simply a 1” x 1” about 16” long fastened to a piece of masonite about 3” x 6”. We clamped these to the frames level with the deck and simply set the panel on it while lining up the next. I used maybe 4 screws to hold the panel to the frames but found that with the little jigs it was not necessary and they actually made it harder to stitch the panels so we removed them. After the bottom panel was in place and holding the other two up we unclamped them and moved them to the other side to complete it.


Here I must confess one error on my part. When I set the frames on the strong back I took great pains to set the angle of frame C. This is the frame with the companionway cut out. When I put the hull chine panel in place things just didn’t line up right. I scratched my head a while and thought, well they said there was room for some gaps and things may need adjusting after all the panels are on. Then in a flash of light I looked at the plans and saw my error. The top of the boat is of coarse upside down at this point and I simply angled the frame aft instead of forward. It would have made an interesting entry to say the least. Not wanting to take the two panels off Stephanie helped me realign the thing and low and behold everything fit like a glove. She didn’t even make fun of me!

If you have been following the forum at Beteau there is another SB 18 project starting up in St. Louis Missouri. Marcelo has his frames cut out and is ready to start building. We wish him the best of luck and look forward to seeing his boat on the water.

I also got an entry in the guest book from Larry A. expressing an interest in coming by to take a look at the project. Everyone is welcome to contact us and see first hand what its all about. I would prefer that most of you show up during the sanding process!

Monday, May 26, 2008

The skins are on...

I'm not going to write much because it's late and we had a busy Memorial Day weekend but for everyone that is patiently waiting here are the pictures.


Saturday, May 24, 2008

It’s getting sticky in here…

Well, we stated gluing things together today and got all the hull panels done. We went back and forth on rather to reduce the panel thickness at each splice, but in the end I decided to go ahead and do it. Using the belt sander and 80 grit paper I took off about 1/16” by 3 ½” from each panel where the splices are making a 7” relief for the epoxy and 6” fiberglass tape. This will make the splices much fairer and should save a little frustration when it comes time to finish things up. We did this on the inner areas only as we have not decided rather to put glass tape over the exterior splices. This will be determined in the morning when we can uncover the splices and get a feel for there strength. After putting a bit of epoxy on the edge of the splice I then moved the panes to about 1/16” apart and filled the gap with thickened epoxy before pushing them tight. A generous coat of epoxy is next followed by the glass tape, covered with plastic and rolled out until the glass is clear to all edges. This technique yields a very smooth finish and if done right will require little or no filling of the glass weave. (for more information on this technique go to http://www.pbase.com/dr_dichro/electric_boat ). After everything looks good we place concrete blocks on the splice to hold it in place while the epoxy cures overnight.

By the way, you can’t fit an 18’ boat in a 25’ garage in flat pieces; you have to leave the end sticking out the door overnight.

Another area of debate is rather to pre-coat the entire panels before assembling the parts on the frame. Some of the more respected experts say yes while a few say no. I posted the question to the Bateau forum and got an overwhelming no. Jury’s still out on that one and I think I’ll read up on it in the Gougeon Brothers book while I fall asleep. There is no doubt about pre-coating the edges but the faces are in question.

Tomorrow we should start setting up the strong back and then the frames can be set in place. We hope to get the panels on the frames by Monday evening, which will give us our first look at a semi-completed SB 18 hull


.

Wednesday, May 21, 2008

Quick update…

Just to keep everyone up to date midweek we have laid out all the hull panels and a few of the cockpit panels and should be able to get them cut tomorrow evening.

If you have followed the news for the Georgia area we had a tornado yesterday evening that touched down within a few hundred yards of our home. We received heavy pea sized hail, strong winds and over an inch of rain in less than 30 minutes. I have seen quite a bit of hail and some much larger than what we got but never this much so fast. I rarely get concerned when these storms arise in the spring as we’ve never had damage from one but yesterday made me a little nervous when the hail got so strong and then a sudden wind change. We were lucky this time and I think I’ll take the reports a little more serious from now on.

Also, we are getting readers from all over the globe on the blog and would appreciate everyone signing the guestbook. See the link above or to the right to view and sign the book.

Until the weekend when we hope to get some pre-coats on and start building the strong back everyone have a safe week.


Sunday, May 18, 2008

A weekend’s reflection...

It took a while but the answer to the mirror image issue came early Sunday morning. The sad part is it really wasn’t that big a problem. The plans most defiantly should be corrected to resolve this issue but I shouldn’t have tried to make it so complicated. I started out, as you know thinking of scanning the detail of the plans at issue and printing a mirrored image to get it to match the nesting plan. I would than sit down with pen in hand and write all the measurements on the print so that I could read them easily. Probably not more than 10-15 minutes work right? Well how about scanning the nesting plan and printing a mirrored image of that. It took about 2 minutes.

Now I only needed to solve the baseline issue. In boat building or cabinet making a 1/16th of an inch off can make a beautiful piece of woodwork look like the grandkids did it with a crayon and a handsaw and as you recall from the previous post I was concerned about being off by that much. This is not the case with the panels used to form the sides and bottom of the boat in what the designer calls a second-generation stitch and glue method. They even state that a little gap is preferred and allows the epoxy resin to bond the panels into a monolithic unit, so accepting that I simply determined the orientation of the first panel and snapped a chalk line. Working with a framing square and straight edge we laid everything out and in no time were cutting them.

So the update reads:

We had a great time at the ballpark today. For an 82-year-old, Mom can give any fan at the park a run for their money. The Braves won and we had a blast.

As far as the boat is concerned we got more done than I expected. We have the hull chine and hull topside panels cut out. I think during the week I can get the bottom, transom plates, cockpit and deck panels cut out leaving us ready to pre-coat all the panels with epoxy next weekend. While the epoxy cures we can begin building the strong back frame and hopefully be ready to set out frames during the following week.


Saturday, May 17, 2008

We ran into a brick mirror…

Well, all was going pretty good this morning. I got the last frame cut out first thing then after running a few errands and adding 8’ to the cutting frame I got the first hull chine laid out on the 6mm plywood. This was very straightforward layout work and we thought we had set the pace for the day. I found one small error in the plan here where a measurement was taken from a different base line than all the others. It was easily caught when we bent the batten across the points to mark for cutting. Using the circular saw to cut the large arced pieces (yes, you can cut arcs with a circular saw) I was done in no time at all. Then it’s just a mater of using the first one for a template, marking it, repeating the cutting process and tada it’s over.

I threw up 3 more sheets of plywood on the table after lunch in preparation for laying out the next panel, which was the hull topside. Here’s where it got ugly. It seems that in the program the designer used to draw the plans the hull topside panel got mirrored on the nesting plan. No big deal if you have a CNC machine cutting out parts but laying it out by hand got tedious real quick. Not only do you need to think in mirror you can not pull your marks from the edge of the plywood as the baseline runs at an angle in order to get the parts from the least amount of plywood. After working on it for a while I decided to come upstairs and scan the paper plans and print a mirrored image out. I can then sit down and write the measurements so there legible. With the exception of the baseline issue problem solved. I’m a little miffed as to what I want to do here. I can pull a line with a string and layout from that I suppose, even pop it in chalk I guess. I don’t like the idea though as a string can move and chalk lines can be 1/16” or more throwing the measurements off by as much.

I have come to the conclusion that I should scratch my head on this for the rest of the evening. If you have any ideas feel free to post them on the forum at http://forums.bateau2.com/viewtopic.php?t=16577

Friday, May 16, 2008

T.G.I.F.

Well thank goodness another workweek has come to a screeching halt. It wasn’t such a bad one though as I did manage to get 2 more frames laid out and cut. In the morning we can get the last frame done and move on to precutting the hull skins. I like to think that we’ll get these completed but we’re taking Mom to the Braves game for her 82nd birthday on Sunday. No complaints about that, she’s a big fan and we don’t get to go as often as we’d like.

An interesting post came up on Bateau’s forum about some deeply discounted mast sections from US Spars. I haven’t heard back from them yet but expect to the first of the week with details and may consider a modification to the original plans with this mast. They are a little shorter (about 3’) and a heavier section than called for. They could be used as either a deck-stepped rig or a keel stepped reduced rig. I’m thinking deck stepped but will see. See the sidebar for a link to their site if you’re interested in more information.

If you have any questions the best way to contact me is through the thread we started on the Bateau forum at
http://forums.bateau2.com/viewtopic.php?t=16577

Sunday, May 11, 2008

3 by Sunday PM

We had a great Mother’s Day and still managed to get 3 more of the frames cut out as planed. Everything has gone well so far and even though I said I wouldn’t post every frame we cut out I thought you may appreciate the update as we lined up the first four frames at the end of the day and you really get a feel for the scale of the boat. Wide stable looking lines are apparent with a sleek sport boat look.


Stephanie says we should include some tips along the way if there really is to be a point to documenting this project but so far I don’t know what to tell anyone taking on a project like this other than jump in and it will come together. There are some general woodworking tips I can give from previous experience as a cabinetmaker and carpenter. The first one is keep an electric pencil sharpener handy. I set mine right on the plywood while I’m laying things out. You’ll be surprised how fast your pencil will dull and you don’t want draw 1/8” lines and mess up the lines of the boat. Another old cabinetmakers trick is to use denatured alcohol to remove unwanted lines and mistakes instead of trying to erase them. It won’t harm or discolor the wood and it’s fast and easy. I like to make my center marks with a colored pencil and also laid out my baselines in color. Blue for centers and red for bases. For large arcs, but not more than about 34” I use a trammel and yard stick combination available at most hobby or art supplies. I don’t know if the big box stores have them but there worth tracking down or do a search online and order one. Just search for yardstick compass and it will come up.


It’s back to work in the morning but I hope to be able to get a little more done during the week. Even just getting the last 3 frames laid out would make the next weekend more productive. I also need to pick up more material during the week. Until then take a look at the gallery for new pictures and please sign the guest book. We would love to here any comments and words of encouragements.

Saturday, May 10, 2008

It's official, we are under way...

We picked up the 9mm plywood yesterday with no hitches and were pretty anxious to start the frames. I hauled the plywood around on top of the van all day to each job site and every time I saw it up there I’m sure I got a grin on my face. It was a long day though and by the time I got home I was beat and we unloaded the materials into the shop and got some rest. I had to run over to a job this morning and I was a little late getting started on the project but Frame A is cutout. The process of laying out the frame from the plans was a breeze. I first set a centerline and a baseline. From there it’s just a matter of working your way around the frame to complete it. I cut the radius with a 3” hole saw before cutting the rest with the circular saw. Leaving tabs at the corners helps hold the frame in place as you work around it and then simply go around with the jig saw to make the final cuts. I don’t plan to post each and every frame as we go so if you don’t see any changes on the blog assume I’m still cutting out frames and all is well. I can get 3 maybe 4 of the 7 cut out by the end of the weekend.

We decided rather than set the strong back up right away we should keep cutting panels while we have the max amount of floor space to work in, so I will need to pick up enough 6mm ply during the week for the hull.

I have included more pictures in the gallery if you would like to see them just follow the link to the right.

Thursday, May 8, 2008

Scrap the foam…

We just got back from the place that had the foam sheets and the stuff looked suspect at best. No labels anywhere to be found and beat all to heck made us decline this one. The plywood is marked plainly and we trust our source for that so we’re building out of BS1088 ply as previously planned. This will also prevent any more delays and have us cutting out bulkheads this weekend, cuts down on fiberglass work too. We have a local source for the plywood and I think we will be using them instead of shipping it from Florida ourselves. This will be easier to manage, as we won’t have to store anything while we cut out parts since space is at a prime around the shop. I mentioned earlier that we would get the ply from Bateau and if I didn’t have a local source I still would but buying local is something we always promote.

Looks like foam...

I found a bunch of Divinycell H80 foam sheets locally and we are thinking of going with it for all the interior parts, deck and bulkheads. The designer, Jaques Mertens has forwarded the scantlings for its use and it looks very doable. Of significance here is the speed at which you are able to get information from the designer. I posted my questions on the forum and when I checked back in fewer than 30 minutes he had posted the response and emailed me the scantlings. More to come as we are really on our way now.

Monday, May 5, 2008

The plans arrive...

Just as expected the plans arrived this morning from Bateau via DHL and after a quick look they are exactly what I had hoped. A found a few minor flaws right off but with the designers quick responses prior to purchasing the plans I expect this will get corrected as soon as I notify them. There are 12 pages of well-detailed CAD drawings and 8 pages of general notes. If your unfamiliar with Bateau you should look at their web site and you will quickly find a world of information about plans, materials, how-to’s and a forum where other builders trade info (as well as the forum geeks that have never built a bird house but are experts on boat building). I will be purchase the plywood and the bulk of the other materials from them as well most likely. I got a quote from them and was pleasantly surprised that the shipping from Florida wasn’t so bad as I expected.

I will give the plans a good look tonight and then I hope to be able to pick up materials this week and get started no latter than Saturday.

First step is to cut out the bulkheads and then I can build the strong back and get them set up. That should be a little more than two weekends worth.

Friday, May 2, 2008

The begining...

The plans should arrive any day now. The garage is cleared and ready. Materials are at the yard-awaiting pick up and I am itching to get going.

Why the change of plans?

If you have seen our other blog “A Catamaran For Two” http://catamaran42.blogspot.com/ you know we are planning to build a mid sized catamaran for coastal and inland sailing. In the realization that a build of this size will no doubt take 2 years or more we have decided to build a smaller boat for much needed recreation during the interim. I wanted something that we (read I), could get on the water rather quickly at the nearby lake and occasionally take with us to visit the kids in Texas and Minnesota.

According to the designer the SB18 should be able to be completed in about 300-350 hours or in about 19 weeks of part time work getting us on the water in the fall for several weekends before the weather turns cold enough to run us back into the shop to dig in on the catamaran project.


Why the SB18?

Well, I’ve always admired the 650 Mini’s and the Open 30’, 40’s & 60’s but these boats are out of my league. This is the first sport boat type design that I felt would make a manageable build/sail possible.

It also uses some of the same building methods that we are accustomed to and will let use try some new materials such as honeycomb cores that we plan on using in the cat.